Showing posts with label Botany. Show all posts

Sunday, April 5, 2020

Montessori Botany - Seeds


MONTESSORI EARLY CHILDHOOD BOTANY - SEEDS STUDY PART I

Children simply adore the study of seeds.  Nothing speaks to energy and new growth quite like a seed and the potential life inside.  Sequoias Class has begun learning all about seeds even if it is long distance.  This post will take you through the sequence of seed presentations and works for the Early Childhood classroom.  Look forward to the second installment as our studies continue.

#1 SOAKING & DISSECTING BEANS
In the Montessori environment we always first introduce the real thing and then move to further abstraction of study.  In order to study seeds we will soak many large bean seeds in a bowl of water so we can explore them later.  It takes several hours, or even overnight for the beans to be ready.  When we are teaching in a classroom we don't want to soak too many or they will go to waste or start to really stink.  We try to soak only as many as we think will be used in a day.  Typically a child who takes this work from the shelf after a presentation will dissect 4-5 seeds on their own.

soaking beans in a sunny window

Once the outside (testa) of the seeds are supple and the seed is swollen they are ready to be dissected and explored.  The guide (teacher) will invite a student, or small group of children (no more than 3) to observe this presentation.

For this presentation you will need -A paper towel folded, tweezers, beans that have been soaking in a  small bowl until supple a tray to hold all the items, and a paper with parts of the beans glued as in the example photo:

Dissecting Seeds Presentation Tray

Dissecting Seeds Presentation
*Lay a vinyl mat or hand towel down on the table.
*Go to the shelf and retrieve the bowl of beans which have been soaking for several hours or overnight.
*Place the bowl of soaking beans at the top left corner of the table.
*Remove one seed and place on the mat.
*Say, "This is a seed.  This seed has been soaking in water for several hours.  I can see that this seed has gotten plump with water.  See how much bigger it is?"
*Point to the hilum of the seed and say, "This is the hilum of the seed.  It is where the bean was attached to the seed pod."
*Point to the micropyle of the seed and say, "This is the micropyle.  It is a small opening in the seed."


*Without speaking remove the testa (seed coat) very carefully from the bean.  Trying to keep it as intact as possible.
*Point to the testa and say, "This is the testa of the seed.  It is like a coat for the seed.  It helps to protect what is inside."
*Peel apart the two cotyledons of the bean seed being careful of the embryo inside.
*Point to the cotyledons and say, "These are called the cotyledons.  They will give the new plant the food it needs to grow."
* Point to the embryo still attached to the cotyledon and say, "This is the embryo of the seed.  It is the baby plant." (sometimes it is really helpful to have a red water soluble marker to mark the embryo with so the child can discern it from the rest of the plant)
*Carefully break off the radicle and say, "This is the radicle.  It will grow into the root of the plant."
* Carefully take off the epicotyl and say, "This is the epicotyl.  It will grow into the stems and leaves of the plant."
*For older and more advanced students who can write: Demonstrate creating a sheet with the parts of the seed glued and labeled.  It will take at least two seeds to create this work.
*Place the unused been seed parts into the compost.  Demonstrate how to clean up all of the pieces and return to the tray.  Then place the tray back on the shelf.
*Let the child(ren) know they may use this work whenever they choose now.  Ask if they would like to work with this work.


PARTS OF THE SEED PUZZLE

After the introduction to the actual seed and its parts the child can be introduced to the Parts of the Seed Puzzle.  I definitely have strong opinions about this work.  In many Early Childhood classrooms there is not a puzzle of the seed parts but it is ever so helpful and highly engaging for students.  There are many puzzle out there that seem like they would be more confusing than helpful to the student.  
I love this set of puzzles that details the entire growth process from seed to young plant.

Growing Process Parts of Puzzles
When a puzzle is not available there are other options such as this one made of felt.

PARTS OF THE SEED NOMENCLATURE CARDS

After the child has had some experience working with the puzzle (or if they choose not to use the puzzle but have experienced dissecting the seed) they are ready for the Nomenclature Cards for the Parts of the Seed.

When presenting this work begin by laying out the control cards only (picture and word card) and do a naming lesson.  This again goes over the vocabulary first introduced in the Dissecting the Seed presentation.  Once all the parts have been named you may take the Movable Alphabet to build the words.  Young children really do love to build the words.  You can find a printable Movable Alphabet here.

Once this presentation has been given you may, at a different time, formally present the Three-Part Card Lesson.  This video is a great explanation into how to give a Three-Part Card Lesson.
Seed Nomenclature Cards Laid Out with Booklet
Early Childhood Parts of the Seed Nomenclature Cards
click on image for link to file

PARTS OF THE SEED BOOKLETS

Booklets just might be THE absolute favorite paper work in the classrooms I have directed.  The children love to color them in and take them home.  Sometimes children want to skip the nomenclature card set and move straight into making the booklets.  I am careful to let them know they may do this work once they have worked with the nomenclature cards at least a few times.  After a while it becomes an understood boundary the children are happy to work with.
Early Childhood Parts of the Seed Booklet Blackline Master
click on image for link to file

GERMINATING A SEED

Children love to watch a seed germinate outside of the soil so they can really understand what is going on.  In this little experiment the child has the opportunity to set up their own seed germinating factory.  Use dicot seed if possible, such as a bean or pea for this work. 

All you need is a tray with plastic baggies, paper towels pre-cut to half size, bean or pea seeds, and tape. Children should get help to write their names on the baggie with a permanent marker.

Germinating a Seed Tray
Demonstrate WITHOUT SPEAKING how to create this work and put it on the window including writing the name.  After the presentation is finished you may say, "When you need to have your name put on your baggie please come and find me or the tonekeeper."  Once the seed(s) are in the baggie the child can tape them up on a sunny window and watch their seed germinate over the next several days.


DOCUMENTING SEED GERMINATION AND GROWTH

This work is especially helpful for more advanced students who can draw something that approximates reality.  That is often a second or third year student in the class.  There is no need to draw the picture every day, unless the child is self-directed in this.  Every few days is just fine.  The children are usually keen to keep track but often need a bit of a reminder of it as an option.

My Seed Growth Diary
Click on image for link to file


With Love,
Cath


Saturday, October 11, 2014

Parts of the Skeleton and Parts of the Pumpkin Nomenclature Cards with Blackline Masters

Here are two offerings that I have finished in these last couple of weeks.  These are topics we are studying right now during October and I found I didn't have either of them created yet.

An important note is that the skeleton cards are patterned after a 3-4 year old's skeleton.  I adapted them from this printable work.

I didn't like any of the Parts of the Pumpkin cards that are out there.  You might notice the same type of cutaway as the layers of the earth.

Parts of the Skeleton Nomenclature Cards
click on image to go to file


These are the blackline Masters for both sets.  I have been learning a new way to make and use Parts of Books that I really like.  The first page in the blackline masters are just the image with no words or even a line.  The following pages are to help me in making the Parts of Control Books.  First I color in the isolated image in red and then I trace over the light gray letters with a fine sharpie pen.   I cut them apart, laminate them and plasticoil bind them.  I make sure that the plasticoil gives plenty of room for turning the page with ease.


One thing I learned years back is that whatever way you write your letters the children will copy.  Another thing I learned during one of my Practicum weekends was that a segment of the population cannot make sense of dotted or dashed letters.  Each dot looks separate and does not really create a whole letter.  This was troubling news to me and I started wondering about my oldest child with dyslexia.  Did that make things harder for her?

When the child creates the parts of books they can do one of 3 things in order to write the words.  They can copy the words because they are advanced enough to do that.  They can lay their colored parts of paper over the top of the page they are trying to create and trace over the letters, or I can write the words in a yellow highlighter for them to trace.  All three methods are regularly being employed in my classroom with great success.

Parts of the Skeleton Booklets Blackline Master
click on image to go to file


Parts of the Pumpkin Booklets Blackline Master
click on image to go to file


Wednesday, October 1, 2014

Nomenclature Cards and Parts Booklets - What a Little Child Taught Me

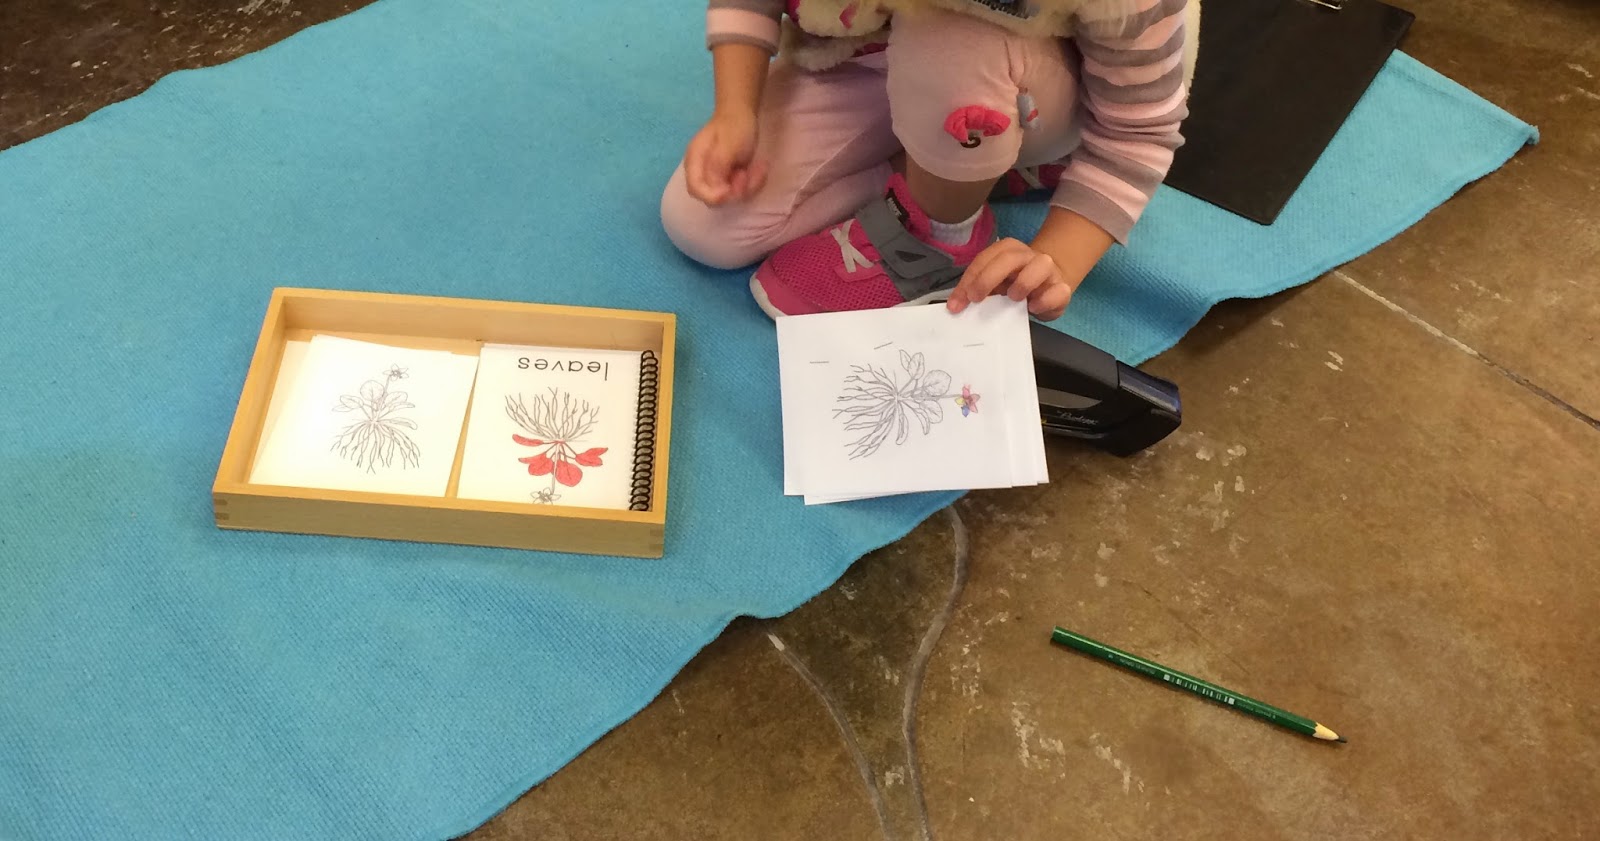
I have formed a new friendship with the Nomenclature and 3-Part Cards and their subsequent Parts of Booklets this year.  Last year a few of the children really loved doing the cards and the booklets, while most of others have shown no real interest in them.  This year I have been hoping to interest more children in these lovely little cards and booklets that I have spent so much time creating (literally), laminating, cutting, coloring, binding etc.  They are great works that help integrate learning across the areas of the classroom.  They can be a pre-reading, reading, writing, coloring, story-telling, show-off to parents, memory building, science, geography, math, sensorial work.  You might be getting the picture.

WELL... this year our class has had the most wonderful thing happen, AND it was child directed.  About the third week into school I had a 4 1/2 year old, who is driven by a lovely inner voice, do the Parts of the Plant and Parts of the Fruit Nomenclature Cards at the same time.  He then made the Parts of Booklets as well.  Another child saw his work and wanted to do it too.  Both were very accomplished at their work.  At the end of the day they asked if they could read their books to the class in AUTHOR'S CHAIR (they knew this from last year and Writer's Workshop).  Of course I let them, and everyone clapped for their wonderful and challenging work.  I could have chosen to save the Author's chair for books that the children had independently created, but I am so glad I didn't.  We will make an extra special note when a child makes a book All-By-Themselves for Author's Chair.

The magic happened the next day.  Multiple children asked me if they could create their own books in order to read them to the class.  One child said... "So when I finish the Nomenclature Cards I can make a booklet right?"  I said that once she had mastered the nomenclature cards she could create the booklet.  The children spread the word and the Nomenclature Cards have NOT sat on the shelf gathering dust (that a child would clean off) this year.  The valuable lesson the children taught me is this: There is such beauty in sharing your work with your friends, and such a good feeling.  As an adult I recognize this in myself.  It is one reason I have this blog.  I love to share what I have created with people who appreciate and can really use them.  Why would it be any different for children?

I just have to say... Follow the Child, they are our best teacher.

Solar System Nomenclature Cards
This is the same child doing the Nomenclature Cards and the Parts of Book in the next Picture.


Solar System Parts of Cards
This Parts of Booklet is pre-stapled because last year I noticed how frustrated the children were 
about this booklet.  They kept getting confused which planet was which.  I have some unstapled 
sets for the older kids.
Parts of the Body Nomenclature Cards
This child ended up getting one more rug out to hold all the name cards you can see at the top 
of the picture for this work.  There really are a lot of cards to this work.  Almost enough to break it 
into two sets, but they really like it together so I have kept them that way.  The Tray is from 
Montessori Research and Development.


Parts of the Plant Booklet
This child did not want to write the words to her booklet this day.  I let her know that as 
soon as she "publishes" a book - meaning that it is colored, with all the names written and 
stapled - she can read it to the group.


Sunday, November 3, 2013

Montessori Botany Primary Parts of Cards - Update!!!

During my new training this summer I learned so much, and have had to adjust my thinking and approach in some ways as I have been stretched.  I am so grateful to have had this opportunity to become a better educator and guide for my children.

As a result of the training I have learned more about the Parts of Cards.  My lovely and VERY knowledgable queen of a trainer, Teresa, spoke about why it is important for primary Montessori classes (3-6 years) to have the isolation of the difficulty in red.  First, our eyes are drawn to red.  This was, of course, not new information for me.  But more importantly, when a child is making their own parts of booklets and they have to keep changing pencils to color, let's say, the horse's legs in dark brown, off white, and light brown for the hooves... the child is actually paying more attention to the COLORS instead of the part they are learning about.  We also discussed which parts are appropriate to focus on for the primary class as opposed to the elementary class.  They should be more simple.  For example, when making Parts of Cards for the fish we will show all the fins together and call them just fins instead of separating them as the caudal fin, pelvic fin, pectoral fin and so forth.

The light bulb went off in my head, I understood it in my heart, and then I groaned within myself.  I knew that all the parts of cards that I have been making and posting on this blog have been geared toward ELEMENTARY and not primary!!  I also knew that I would need to remake my cards for the children's sake.  It took me a couple of weeks to really get my soul prepared... and then I went to work.

part of the fruit of my efforts are in this post.  I am actually excited now to make more.  I have been wanting to make parts of cards for tools, the house, and other things like cars, planes and trains that some of my students are fascinated with.

You will note that Botany and Zoology cards have a colored line around them.  I have considered this idea for a long time, but wasn't sure how I really felt about it.  Now I am ready to roll with it.  Another thing to note is that I have done these cards in D'nealian only.  I will not lie that it is my preferred font for parts of and nomenclature cards and I am not ready to do the print font yet.

This is a living and changing experience for me and it follows as the night the day that my blog will also change.

Botany Parts of Cards


Primary Parts of the Plant Cards - red isolation
click on picture to link to file
Primary Parts of the Tree Cards - red isolation
click on picture to link to file
Primary Parts of the Leaf Cards - red isolation
click on picture to link to file
Primary Parts of the Flower Cards - red isolation
click on picture to link to file
Primary Parts of the Fruit Cards - red isolation
click on picture to link to file
Primary Parts of the Seed Cards - red isolation
click on picture to link to file

Thursday, January 24, 2013

Plant and Animal Cutting and Pasting Sheet

This is another cutting and pasting work that I just found in my files that I hadn't uploaded yet.  This work goes with the Plant and Animal presentation from this post.  The child cuts, sorts, and then pastes to a new sheet to complete this work.  There are two kinds of labels for you to choose which font you want to use.
Plant/Animal Cutting and Pasting Sheet
click on picture to link to file

Living Nonliving Cut and Paste Work

I have been looking around my files to see what else I have forgotten to put online.  I have found a few things.  This sheet is a companion work to the Living/Nonliving cards used in this post.  The children can cut them out, sort them, and paste them to another sheet to complete this work.

Living/Nonliving Cut and Paste Sheet
click on picture to link to file

Thursday, January 3, 2013

Picture and Object Sets for Early Learning

Over the years I've had my own and other children asking me if they could see more pictures of sea slugs or kinds of houses, volcanoes or octopus - you name it, they really want a chance to see more pictures of things (especially things they don't get to see very often).  Just two weeks ago I had a child ask me if I could make a set of more pictures of sea horses for our classroom.  Other children chimed in that they would like it too, especially of daddy seahorses with babies being born.  So, I of course wanted to make them.  We had just finished reading a great book called Seahorses that showed a father seahorse with the babies popping out of his pouch.

I tend to put these picture sets out in a basket with some items, if possible, on the subject that they can explore as well.  I print, cut out and laminate the cards and then put them on a large ring.  After that I put them in the basket with the other items and set them out on the shelf to explore.  I find that this is a great way to ignite the curiosity of the youngest children that do not have reading skills.  They begin to wonder all about things that they never knew existed before.  Not only this, but a sense of awe and wonder begins to develop about the beauty of our earth.  Many times a little child will bring me the Globe of the World Parts (also called the Continents Globe), and ask me where these "things" are on the earth, and then we get to have a child initiated conversation about Great And Important Things.

This first set that I am showing you is called: Shells, Starfish and Sand Dollars.  It is the first set I  put out in the year.  This basket has a HUGE sand dollar (about 5 inches across) I found at a thrift shop, a nice sized starfish and a large hermit crab figurine along with a magnifying glass for exploration.  It also has the Photo Set which has several pictures each of shells, starfish and sand dollars.
Shells, Starfish and Sand Dollars Photo Card Set
click on photo to link to file


What frequently happens with new children in the beginning is they are just interested in the objects in the basket, but after they have worked with them a few times they will begin to look through the photos.  After a short time, a child will look at a photo and begin to make comparisons with the physical object.  I just feel tickled the first time I see them using the magnifying glass and to look at the object and then turning to a picture and using the magnifying glass to look closely at a photo card.

This is one of those baskets at the beginning of the year where the children come away feeling calmer, refreshed and happier after using.  I think it is also one of my favorite tools to begin to instill care of the items on the shelves and in the classroom.  They are really awed by the size of the sand dollar and yet, it IS breakable as well as the starfish.  When presenting to a child, I speak about these beautiful and incredible gifts that I have brought to the classroom for them.  I also speak about how these are the outsides of an animal that used to be alive.  I ask them if they would like to take VERY special care of this sand dollar and all the other things in this basket?  This sets them off in the right direction to care for them correctly.

Shells, Starfish and Sand Dollars Basket with Photo Cards
I am excited to unveil future sets for the enjoyment and learning of the little people in your lives.


Saturday, December 15, 2012

Botany Nomenclature Set Little Books

I promised to get these Little Books for the Montessori Botany Nomenclature Set for ages 3-6 up soon.  This weekend I have had a few minutes to breathe and create.  This has been high on my list of items to  finish and get posted.

In Montessori education children are encouraged to treasure their work and to make it beautiful.  They can take a few minutes, an afternoon or over several days to complete a booklet.  It then can be placed in a folder or binder of collected works throughout the year or, in a homeschooled setting, years.

Sometimes a very young child will show a real interest in booklet making before they can write independently.  This is a good time to use the tracing sheets, as well as for any child who wants that greater support.  I have always been drawn to the phrase, "You are more advanced now.  Would you like to see a new way of doing this work?"  This tends to help children feel good about moving onwards and upwards towards independence in areas that can sometimes feel tricky to some children, like writing.  In this way a child is never compared to another.  The focus is directly on the child in your presence and his/her personal path.

This file includes both Print and D'nealian fonts as well as a blank lined sheet for the Parts of the following:

  • Plant
  • Tree
  • Leaf
  • Stem
  • Flower
  • Root
  • Fruit
  • Seed
ENJOY! :)
Botany Nomenclature Set Little Books
click on picture to link to file

Friday, November 9, 2012

Montessori Botany Nomenclature Set For Primary 3-6 years

I am so excited to unveil my newest set of Free Downloadable Nomenclature Cards for the  3-6 classroom!

I have been working on this set for a long time.  I had been posting them as I finished them, but I want to share them in one set.  A lot of love, energy and time has gone into creating these cards. I have loved botany ever since high school when I had a fabulous teacher who was passionate in her teaching.  When I began to learn about the Montessori Method I was simply thrilled that Botany was such an integral part of early learning.  Children are introduced to parts of the plant, seed, fruit, tree, leaf, flower, root etc. at such a young age and are given unsimplified terms for them.  It was amazing to me that Maria Montessori found that they really WANTED to know what the real names for the parts of the .... were.

In my own classroom, I find the children always are so interested in the roots that they cannot normally see.  They love to take a cutting of a root and look at it closely under a microscope.  They become fascinated with the smaller parts of a leaf like the stipules, or veins that they had not really paid as much attention to before they had a name.  Giving a name to something truly does increase it's importance.

What we find in nature feeds our souls, helps our spirits to be softer and gentler.  When children are taught to care for all forms of life we can help to prepare them to be better stewards of the earth than previous generations.  The Montessori Botany program takes such care to continually expose children to the many wonders in nature.  The Botany Cabinet is so wonderful - take in the scope of learning that so many different shapes of a leaf can provide.

This is the Botany Manual I use for my yearlong program.  I have chosen to make the parts of the plant and parts of the tree as separate sets (this is different than what is in my manual).  I have also included the axis of the plant in the tree cards, and have called it the axis of the tree.  Many years of working with children has led me to the decision to broaden these lessons.

I am sharing these cards with all sets in one so it is a bigger file.  You can choose either Print or D'nealian font.  Personally, I am really proud of this set of cards.  I have wanted to make the full set for SO many years now, and it is a real accomplishment for me.  They are all beautiful and great quality as well. (I will post the Little Books in a new post SOON)

The Botany Set includes nomenclature cards for the following :

  • Parts of the Plant - plant, leaves, stem, flower, roots
  • Parts of the Tree - tree, trunk, branches, leaves, roots, axis of the tree
  • Parts of the Root - root, primary root, secondary roots, root caps, root hairs
  • Parts of the Stem - stem, main stem, axillary buds, nodes, internodes, axil
  • Parts of the Leaf - blade, midrib vein, side veins, petiole, stipules, margin, apex
  • Parts of the Flower - flower, corolla, pistil, stamen, sepals, calyx, pedicel, receptacle
  • Parts of the Fruit - fruit, pericarp, exocarp, mesocarp, endocarp, seeds, blossom end, stem, leaf
  • Parts of the Seed - seed, testa, cotyledon, radicle, epicotyl

Botany Nomenclature Set - Print Font
click on picture to link to file

Botany Nomenclature Set - D'nealian
click on picture to link to file
 

Wednesday, October 24, 2012

Parts of the Fruit Nomenclature Cards and Little Books

I have been wanting to create my own parts of the fruit set of nomenclature cards for a while now.  I have been struggling to find the right pictures to use.  I am happy to say that I have been able to take some images that I liked and change them to fit my needs.  I will be using this set along with my favorite manual for Botany from HERE.  I could have made these the parts of the apple, but this way these cards fall right in line with my manual.

In my book, autumn is the perfect time of year to talk about apples and parts of the fruit.  I love apples, I love fall, I love cooler and crisper days.  I also love to listen to the chatter that children engage in during snacks, at down times, and outside in the fall.  This time of year just feels good inside, doesn't it?

I never pull out the fall themed items until it is really fall.  I try to stick to summer themed items until the children would really start seeing apples ready for the picking.  I guess that comes from my stint in upstate New York where I lived in an apple growing and harvesting town.  Fall sort of feels like a beautiful and crisp macintosh to me.

These Parts of the Fruit Nomenclature cards include the following:

  • fruit
  • pericarp
  • exocarp
  • mesocarp
  • endocarp
  • seeds
  • blossom end
  • stem
  • leaf

Parts of the Fruit Nomenclature Cards
click on picture to link to file

Parts of the Fruit Nomenclature Cards - D'nealian
click on picture to link to file

These are the little books for the Parts of the Apple.  These books include both Print and D'nealian tracing fonts as well as a blank line for independent writing.

Parts of the Fruit Little Booklets
click on picture to link to file
 
Because I love apples so well, I will be creating another post devoted to my favorite books, activities and so forth I have come to love over the years.  We will see that later.  Have a wonderful week everyone!

Monday, August 6, 2012

Parts of the Seed Nomenclature Cards and Little Booklet

I just finished these free Parts of the Seed Cards for myself and for all of my wonderful readers.  YEAH!

You will notice that I have done something a little different for these cards.  There is actually not really a standard in the Montessori community when it comes to naming the parts of the seed.  I have made two cards for a couple of the parts so that you can choose which one you want to use at your place.
Parts of the Seed Nomenclature Cards
click on picture to link to file
The following terms are used:

  • Seed Coat/Testa
  • Seed Leaf/Cotyledon
  • Radicle
  • Embryo/Epicotyl
This is the Little Book to accompany the cards.  The child looks at the nomenclature card, colors the corresponding part on his/her page, and then writes in the name for that part.  You can cut them apart for the child, or they can do the cutting themselves.
Parts of the Seed Little Booklet
click on picture to link to file


This site carries my favorite bean seed puzzles to go along with these cards.  A Parts of the Seed Puzzle  could easily be made out of felt.  The following file could be used as a template.  I have used it on the shelf as a pasting activity for the children to make their own little seed to take home.  I will have to make an example in the next couple of weeks to show you.
Parts of the Seed Pasting Activity/Felt Puzzle Template
click on picture to link to file


Wednesday, July 11, 2012

Types of Seeds Cards

To continue my work in creating as many materials that I have been using from another source...
I have just finished this set of cards for different types of seeds that are pretty common in children's lives.  Right now I am just including the cards with names.  Later I may create definitions.  To make these into a matching game, print two sets.
Types of Seeds Cards
click on picture to link to file

Included are the following:
  • pomegranate
  • pumpkin
  • apple
  • black beans
  • popcorn
  • walnuts
  • avocado
  • chickpeas
  • sunflower
  • acorns
  • black eyed peas
  • peanuts
  • almonds
  • poppy
  • wheat
  • peach pit
  • celery
  • maple
If a child is not familiar with one or more of these seeds - they should handle and explore the real thing before introducing them to the card for it.  Of course we must always be careful of allergies when dealing with food.


Saturday, June 9, 2012

Fruit Inside and Out Matching Cards

I just finished this new set of cards for matching the inside and outside of different fruits.  You can print them out, laminate them and place them in a basket for even very young children to match.

These fruits are all easily procured from the grocery store, so I suggest getting enough to have them for snacks so that children can see them cut in half, or peeled in the case of the banana.  Many of these fruits are also easily cut, so you could create a cutting exercise with several of them to go along with them.  Just be careful that the children who are presented with the cutting exercises of the fruits have already mastered other cutting exercises with knives.  Of course an adult must always be present when cutting with knives is offered.
Fruit Inside and Out Matching Cards
click on picture to link to file
 

Monday, January 16, 2012

Fruit Matching Game

This is the fruit version of the Vegetable Matching Game.  Some of the fruits represented are not seen frequently by children so you may want to do a naming lesson before using.

You could choose to create some dishes with the fruits that are not well known to peek their interest in unknown fruits.

There are 6 playing cards with 6 photos of an isolated fruit on it.  The child or small group of children will match the fruit with the matching card.  Ways to play include the following:


  • each child gets a playing card, and the corresponding matching cards to match their own cards
  • each child gets a playing card, and draws from a reservoir of matching cards face up on the rug or in a basket
  • each child gets a playing card, and draws from a reservoir of matching cards face down on the rug
  • one child uses two or more playing cards to match from a basket of matching cards
  • one child uses all of the playing cards to match from a basket of matching card
Fruitimatch Game
click on picture to link to file

To create this game:
  • print off one of each page 1-6
  • cut out each playing card and each of the corresponding matching card
  • place corresponding stickers on the back of a playing card and the matching cards to aid in keeping correct cards together
  • laminate everything
  • place in a basket
*Here is a guide to the playing cards

Guide to Fruitimatch
click on picture to link to file
 

Saturday, January 14, 2012

Vegetable Match Game

This free download is a fun game for young children.  Some of the vegetables represented are not seen frequently by children.  It is a great springboard for conversation, to talk about where the vegetables come from, and add to a young child's vocabulary.   - You could even use the cut out matching cards in part of a continents box to show the origins of foods.

You can also create some dishes with the vegetables that are not well known.  Children are more likely to try new things when their interest has been peeked.  If you allow the child to help in the preparation of the dish they will be even more likely to enjoy the dish.

For these cards I have used the 'culinary' definition of vegetable.  If in the kitchen the item is used to prepare a savory dish, it is called a vegetable.  Pumpkin can go both ways, so I decided to use it in vegetable along with other squashes.

There are 6 playing cards with 6 photos of an isolated vegetable on it.  The child or small group of children will match the vegetables with the matching card.  Ways to play include the following:

  • each child gets a playing card, and the corresponding matching cards to match their own cards
  • each child gets a playing card, and draws from a reservoir of matching cards face up on the rug or in a basket
  • each child gets a playing card, and draws from a reservoir of matching cards face down on the rug
  • one child uses two or more playing cards to match from a basket of matching cards
  • one child uses all of the playing cards to match from a basket of matching cards
You could certainly create more ways to use this work.  When this game is used cooperatively it will be the funnest of all.  I stay away from competition in my classroom, and strive to help children learn that by working together and helping each other we truly all win.
Veggimatch Game
click on picture to link to file
    
To create this game:
  • print off one of each page 1-6
  • cut out each playing card and each of the corresponding matching card
  • place corresponding stickers on the back of a playing card and the matching cards to aid in keeping correct cards together
  • laminate everything
  • place in a basket
*Here is a guide to the playing cards
Veggimatch Guide
click on picture to link to file
 

Thursday, January 12, 2012

Flower Matching Cards

This little set of flower matching cards is a good set for non-readers and readers alike.

There are 18 different kinds and colors of flowers represented in this free set.

In order to create this set:


  • Print one copy of each page - one set will be large and one will be small
  • Cut out the matching cards
  • You could color code the back of each set for self correcting if desired
  • Laminate the matching cards
  • Place in a small basket
  • Give a short naming lesson for the cards
UPDATE!!! - file has been updated to include flower names with cards.

Flower Matching Cards
click on picture to link to file
 

Thursday, January 5, 2012

Fruit and Vegetable Matching Cards

This set is great for children who are not yet reading.  They can help to build vocabulary and awareness of the child's world.

This file includes A LOT of different fruits and vegetables.  54 in all.  This means that you can have some choices about which fruits and vegetables are available for the child to use at a given time.  This also means that this work is interesting for a longer time.

I would limit the number of available cards to about 15-20 pairs.

In order to make this work:

  • Print two copies of each page
  • Cut out the matching cards
  • You could color code the back each set for self correcting if desired
  • Laminate the matching cards
  • Place in a small basket
  • Give a short naming lesson for the cards that will be available first
  • Give a short naming lesson when cards are changed
Fruit and Vegetable Matching Cards
click on the picture to link to file
 

Tuesday, October 4, 2011

The Four Seasons Charts with Control Chart

This Seasons Chart features the same tree through the different seasons of the year.  I looked a long time to find something like that.  I wanted my children to see the same thing changing as the seasons changed.  The file includes instructions.

Four Seasons Matching Exercise and Control Chart
click on picture to link to the file
  

Monday, October 3, 2011

Life Cycle of an Apple Nomenclature and Control Chart

Fall is my favorite time of year, and part of that love comes from the comforting feeling of fall apples.  When I lived in upstate New York, for a season, I grew to love REAL cider.  These cards are beautiful -  even if I do say so myself.

Life Cycle of the Apple Nomenclature Cards
click on picture to link to the file

Life Cycle of the Apple Control Chart
click on picture to link to the file