I am in love with this work. Not only because it took a while to produce, but because I got to make it with my sweet son, Andon, who is battling Leukemia right now. I want to express my thanks and love for all your support and kindnesses during our fight. We are not done yet by any means. He still has another 2 years and 10 months, at least, to go. |
| The Oceania mat laid out. I forgot to take a picture of the mat in the bag. |
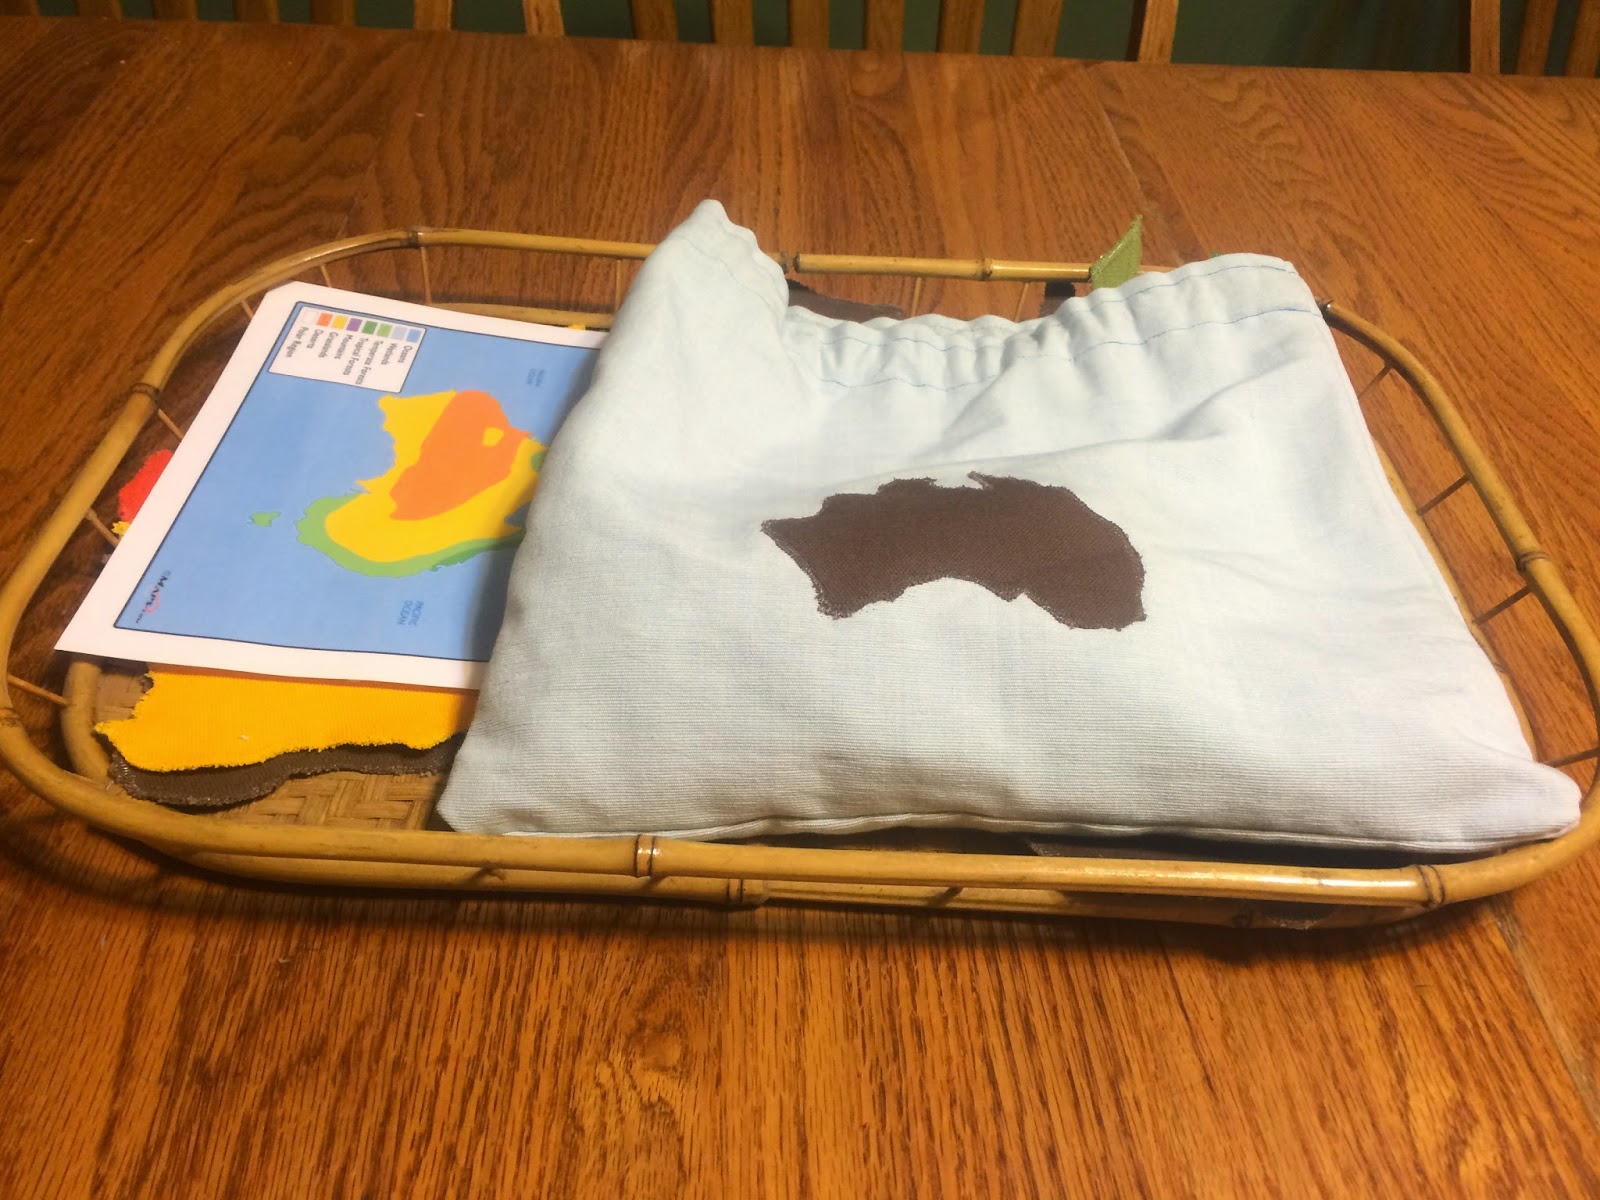 |
| The work on the tray. The mat itself is kept in a bag that can hang on a wall or sit behind the tray on the shelf. |
Since Andon has come home he has been VERY interested in islands, and we have studied all kinds of them when he has felt well enough. In fact his Make-A-Wish wish is to go to Aulani resort in Hawaii with his family. He wants to see the island up close, swim with the dolphins, and learn to surf. He has also had a real interest in Australia, so I thought it would be perfect to study Oceania. I figured I do several things all at the same time, and get some work in for school as well. We ordered the Elementary Biome work from Waseca Biomes, which will arrive on Wednesday (we are so EXCITED!!!). While I've been waiting for that to arrive I set to work making something I have been meaning to make for over a year now. The Early Childhood mat of Oceania. Since Andon hasn't been exposed to this type of work he helped me to create it while also learning. We spent some time learning about the animals, plants, biomes, industry etc. of Oceania and then we worked to create this mat. He has learned a lot of things through this process, and has really enjoyed it.
The first order of business was to find a site where I could print a large-scale copy of Oceania. I found that here. I used the 4X4 setting, which used 16 sheets of paper. I tried the 5X5 setting first, but thought it was too large. I wanted to be certain that littler arms could reach the center of the mat without walking on it.
NOTE: I think it is important that children be exposed to the Biomes before they start this work. Waseca has a great curriculum that you can download for free. It is, however, one of those life changing and mind expanding sites. I LOVE their biome work, but am not such a fan of their rainbow boxes for language. I DO, however, love their biome readers.
 |
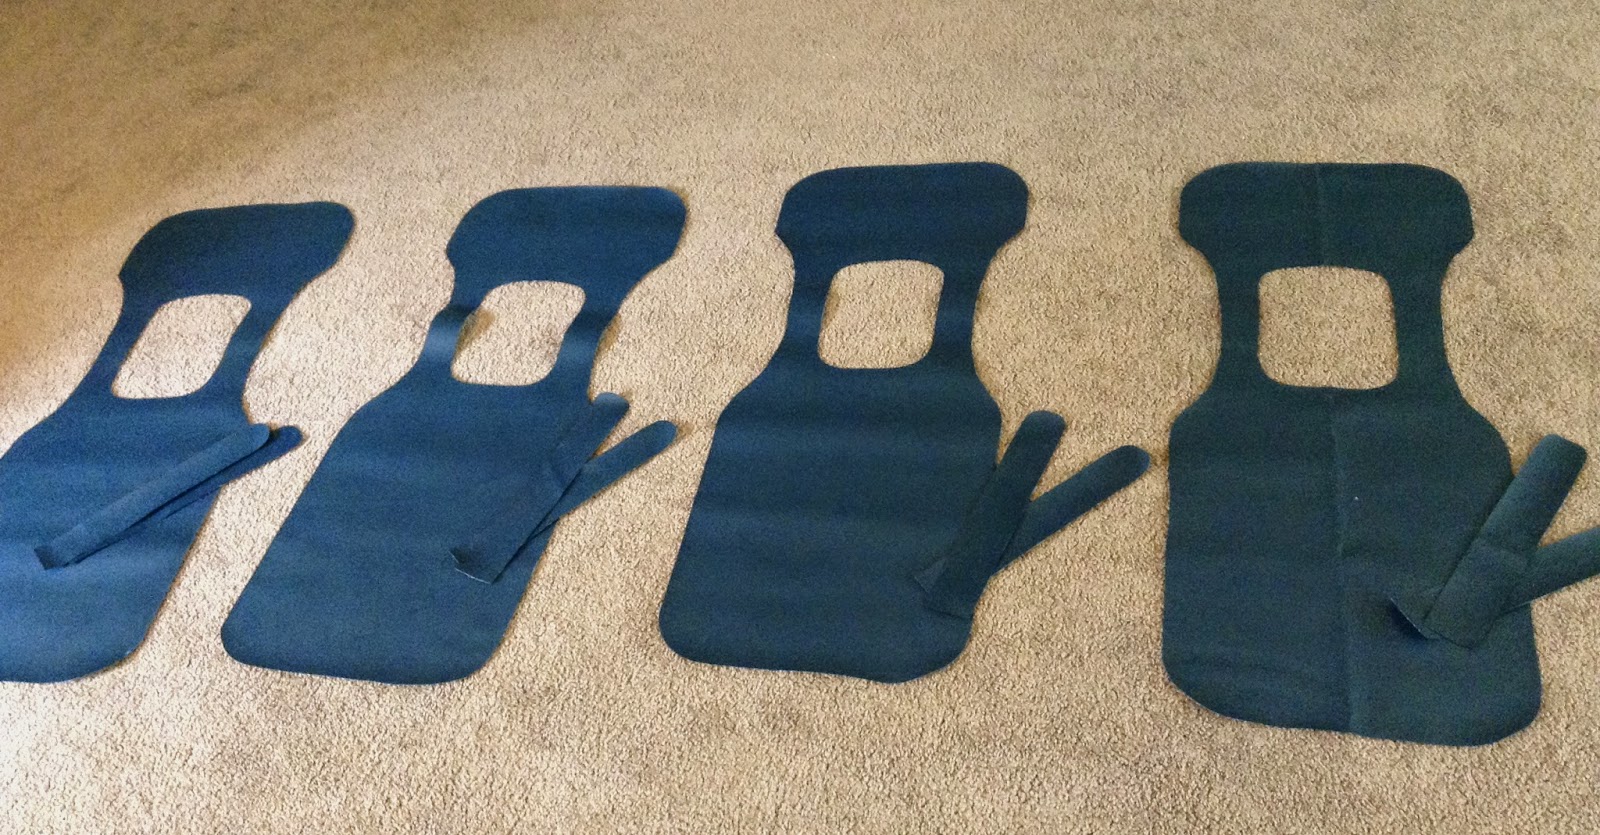
| I traced Australia onto brown Duck Canvas twice. This was to give stability and a control of error you will see later. I used some of the left over brown canvas to make a bag to hold the mat. |
 |
| I turned the paper pattern backwards so that when I cut out the fabric I could turn it the right way and not have the tracing show. |
 |
| In this mat I am teaching the child the biomes found in Australia mostly. The other islands won't have their biomes expressly taught since they are significantly smaller. Sorry to all my kiwi friends :). I do talk about them in the presentation a little. You can see the biome map I am referencing above. You can find it below. |

 |
| I sketched out the biomes onto the paper pattern. |
 |
| Then I cut them out. |
 |
| I traced those lines onto the front of one of the canvas cut-outs of Australia. Once that was finished I used a triple stitch and a light blue thread to sew the lines onto the top piece of the cut-out. |
 |
| The next step was to pin the two pieces of fabric together and sew them. |
 |
| I used clear thread and a zig-zag stitch. |
 |
| I cut a piece of blue Duck Canvas to 20X40 and placed Australia where I wanted it on the fabric. I was certain to leave plenty of room for New Zealand, Papua New Guinea and some of the smaller islands of Oceania. I traced the outline of Australia onto the front of the blue fabric. I then used brown thread to sew the outline onto the blue fabric. |
 |
| I then cut the biomes out of their respective colors. Again I used duck canvas and cut two of each piece. I traced the major rivers and Lake Eyre onto the top side of the biome fabric and sewed them in a darker blue thread with a triple stitch. Once that was done I again sewed the pieces together with clear thread and a zig-zag stitch. |
 |
| I cut out a small Australia and sewed it onto this light blue fabric with clear thread and a zig-zag stitch. I then turned it into a drawstring bag. It holds items that go onto the mat. Here you can see the stitch work on the biome fabric. |
 |
| Next I made pieces for Papua New Guinea and New Zealand. I used some tan vinyl to do the other side in order to be neutral. I cut two pieces of blue for each, sewed the islands onto the top side with clear zig-zag. The white paint dots you see are for the placement of objects. |

 |
| Using the sewn island pieces, I traced onto the blue mat and then sewed the outlines for them in blue thread with a triple stitch. Some of these photos were taken at night so they didn't turn out so well. |
 |
| Once New Zealand and Papua New Guinea were made, I used the large scale print-out as reference to trace more smaller islands onto the mat. I used brown fabric paint to paint them onto the mat itself. Tasmania was cut out of the Duck and sewn directly to the mat. Then I used double fold bias tape in a dark brown to finish the mat. The contrast of color is nice. |
 |
| This shows the basic set up of the mat with just the brown fabrics. |
 |
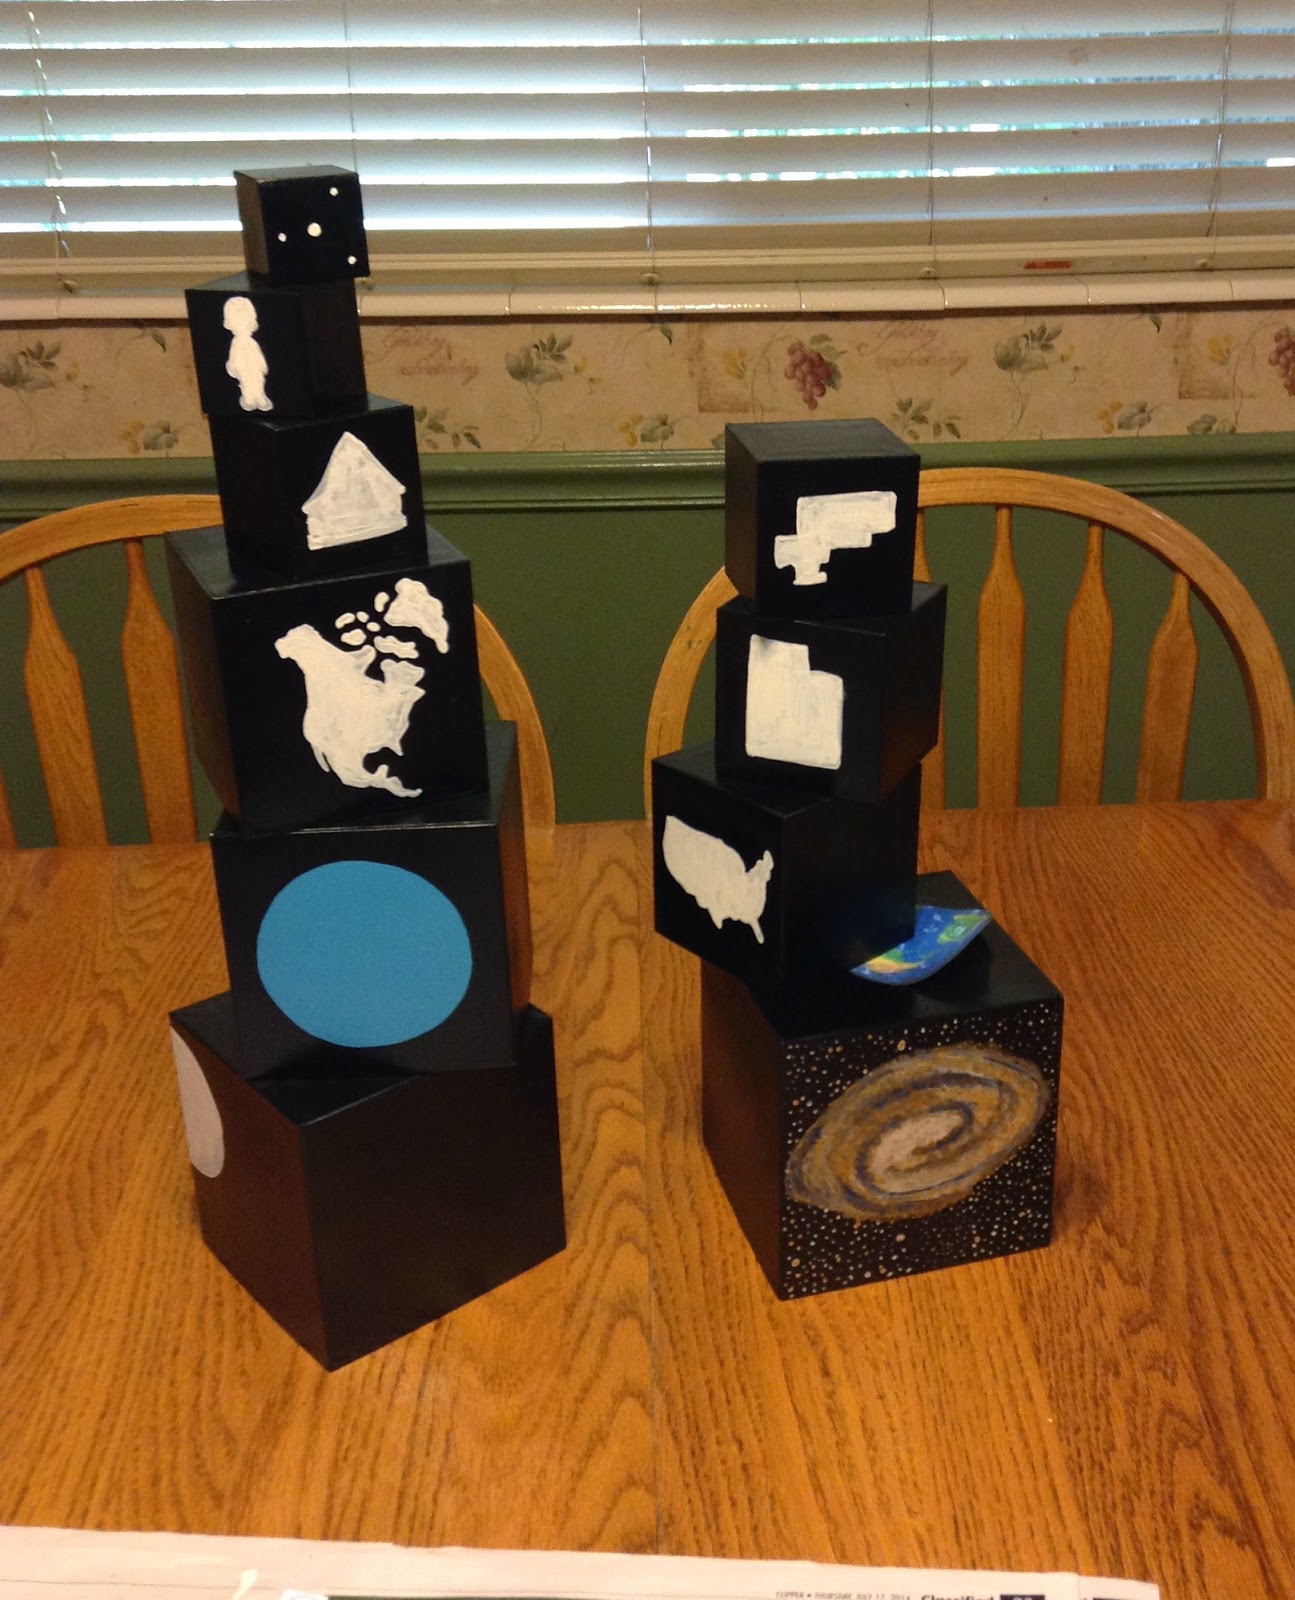
| Finally, all the fun stuff is added. I am a big fan of using already made resources if I can. The Down Under Toob had a lot of these things. I also used the cycad palm from the Trees Toob, the coral, seahorse, diver, chest of gold and clown fish from the Coral Reef Toob. I used the apples and bananas from the Fruit Toob. I used Super Sculpey to create the Mountain ranges, Ayers Rock, the base of the Aboriginal man (because he doesn't stand on his own), and the volcano. I used a wooden disc and painted it with dot painting. I cut very thin blue rick-rack for the rivers, and blue felt for Lake Eyre. Each item is placed during a "story" told to the children. I am working to find a tiny boomerang, cassowary, echidna, kiwi bird, "diamond", "opal", sheep, Maori carving and Sydney Opera House. |
"This is Oceania. Well, not all of it, but a lot of it. There are many small islands not on this mat, but this mat has Australia (place it), Papua New Guinea (place it), and New Zealand (place it). Here is also Tasmania (point to it). Up here at the top are several smaller islands (name some of them if you can).
"In Australia we can find several biomes (pull out the biomes control card). The orange is desert (place the desert), the yellow is grasslands (place the grasslands including the small yellow piece), the light green are the temperate forests (place the temperate forests), and the dark green is the tropical forest (place the tropical forest) We can find some rivers in Australia. Down here we have the Darling River, the Lachlan River, and the Murray River (place the three rivers together) Over on this side is the Murchison River (place it). There are other rivers in Australia, but these are some of the largest. Sometimes the rivers in Australia DRY UP! Sort of in the middle of Australia we have some lakes. I am just putting on Lake Eyre because it is the largest lake (place it). On the eastern edge of Australia there is a range of mountains. These mountains are called the Darling Range (place the three mountain ridges). This curved set on the bottom is also know as the Australian Alps (point to the bottom ridge). In the center of the desert is a very large rock formation called Ayers Rock. The Aboriginal people; the people who have lived here a very long time, call it Uluru (place it and the Aboriginal man) and it is very special to them. In the desert there are gold mines (place it), and diamond mines (place it), and opal mines (place it). Bananas and pineapples are grown in Australia because it is hot (place them). The Aboriginal people create wonderful works of art called dot painting (place it). We will be creating some of these ourselves. Off the west coast of Australia people dive for pearls (place the diver)."
"Emus live almost ALL over Australia (place it), so do cockatoos (place it). Frilled lizards and kangaroos live mostly in the hot deserts and in the grasslands (place it). Dingos can be found a lot of different places in Australia, but they are finding less and less of them all the time (place it). The taipan lives right along the upper coastal areas of Australia (place it). The platypus lives on the western edge of Australia (place it). Koalas have to live where they find eucalyptus trees, so they live on this western side of Australia (place it). Wombats only live down here as you get to the southern tip of Australia. They also live in Tasmania (place it). Another animal that lives in Tasmania is called the Tasmanian Devil. It is known for being very aggressive (place it). Off the east coast of Australia we can find the Great Barrier Reef. It is home to many kinds of Corals (place it), fish (place clown fish) and seahorses (place it). There are many, many other kinds of animals that live in the coral reef, but we will learn about them when we study the coral reef. In New Zealand they have many volcanoes (place it). They grow apples and they herd many sheep (place them). In Papua New Guinea and on the top of Australia we can find the Saltwater Crocodile (place it). We can also find a kind of palm tree called a Cycad (place it). Scientist believe that this type of palm tree has been around a very, very long time."
When you are finished with the presentation, carefully return all the items to the bag. return the pieces to the tray. Roll up the mat and put it in the mat bag. Ask the child(ren, because by about 1 minute in you will have most of the class wanting to watch your presentation) if they would like a turn with this work. When they say yes, you get to tell them that you will show them where to find it on the shelf so they will know where to put it back. You then put the entire work away before allowing the child to use this work. In this way you are consistently showing the child the importance of putting their work away in pristine condition for the next child to use.
The best thing about this work is that it has endless extensions. Reading, writing, grammar, math!!